Wednesday, November 10, 2010

First Official Sew-A-Thon - With Pictures!

Ok, here we go! You ready?

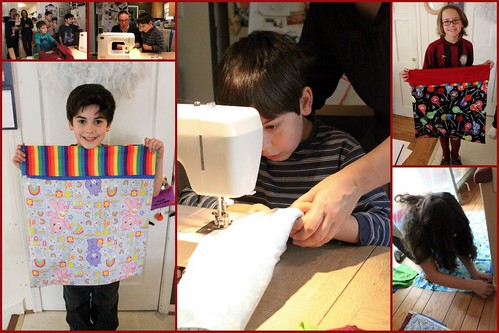
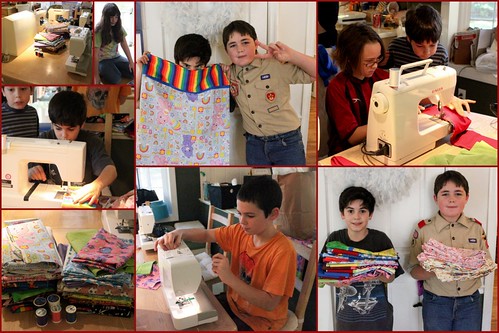
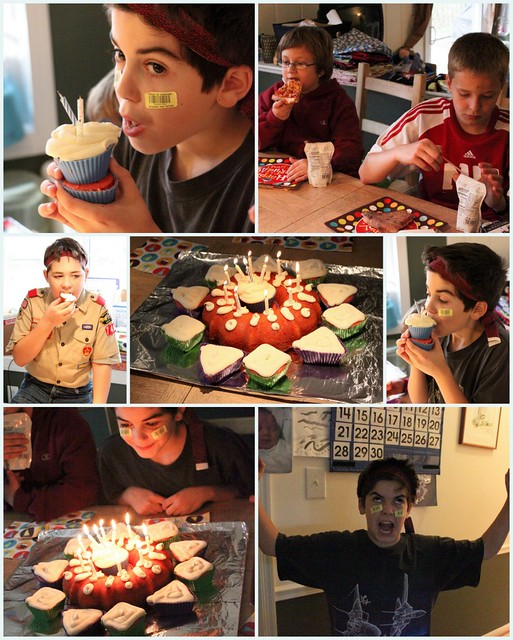
The awesomeness kid of the day is our buddy J. He offered to let us invade his 11th birthday party and show the kids how to make pillowcases. He and his mom picked out some of the coolest fabrics. We had some of the coolest kids show up and we got a lot of good stuff accomplished!

One of the neighbours came over with ten pillowcases she made before the party. That was really cool. She also helped a little and plans to make more pillowcases. To our friends up north, thanks for working so hard on this project! Your support? Totally rocks! And gives us hope!

Joram, Caramon the Million Pillowcase Kid's brother, used his mad dog sewing skills to help us teach the other children and prepare the "hot dogs" for making. Mmmm hot dogs.

It was super crazy and super wild and SUPER FUN!

Unfortunately, I wasn't able to get how to photos. So no tutorial yet. We'll continue to work on this. I promise.

Now, are you ready for some photos? Yeah? Well here goes:


Million Pillowcase Challenge


Million Pillowcase Challenge

Million Pillowcase Challenge

Yup, it was super fun! Once again, THANK YOU!

Are you interested in hosting a Million Pillowcase Sew-A-Thon? Ask us what you need and if we can come!

We have to look at the calendar at our local church building to see when during the crazy holiday season we can host a sew-a-thon here in our town. I hope we can do something. My table is but only so big. We'll make it work if we need to!

--Lady Ozma and the Caramon, Million Pillowcase Kid

Saturday, November 6, 2010

Sew-A-Thon Update and Matthew Blanchard Foundation

Greetings this lovely Saturday afternoon!

We are here to report the first sew-a-thon went very well. If you look right, you can see we've updated our collected pillowcase numbers! Huzzah for pillowcases!

We will blog more about the sew-a-thon after we've all recovered a little bit. But we want to give a great big:

THANK YOU SO MUCH

to our big suporter that used his ELEVENTH BIRTHDAY PARTY as a sew-a-thon for Caramon, the Million Pillowcase Kid! That's the AWESOME.

Oh and a great big:

HAPPY BIRTHDAY

as well.

That said, we also want to feature a kid, who like Caramon, has a childhood that is filled with many doctors appointments and worries. We just saw this on Twitter and wanted to share it with you. If anyone is in the greater Vegas area and looking for some service opportunities... here you go. Check out the Matthew Blanchard Foundation now.

We look forward to updating - WITH PICTURES - soon!

Have a wonderful and blessed Saturday!

--Lady O and Caramon, the Origami Kid

Wednesday, November 3, 2010

Wordless Wednesday: APPROVED!


That's right... WE ARE OFFICIAL!

Special Credit to:
Lady O (Mom that helps me type)
Dad (For helping me figure out the PDF
Grandma (For driving me to my last appointment)
My Bishop (for signing paperwork three times)
Every Scout Leader I've ever had or will have
Everyone else supporting the project.


--Lady O and Caramon, the Million Pillowcase Kid

Monday, November 1, 2010

Hot Dog Pillowcase Ingredients and Recipe

So you want to make your own pillowcase? There's about eleventy hundred tutorials on the web. However, we can work towards making one if you need us to... after all guess what?

Our FIRST sew-a-thon is on Saturday!!!!!!

That's right! We want to give a great big shout out to our friend that wanted to do this as his BIRTHDAY PARTY. What a great kid! We shall bring you footage from this event sometime next week hopefully.

In other news, the paperwork has made it through everyone but the last person. Caramon, the Million Pillowcase Kid, set up an appointment to do that final step tomorrow night. Huzzah for being "official". Good timing with that sew-a-thon planned!

What do we need to make a pillowcase?

Well basically you just need some fabric and thread, but if you want to know what you need to make the cute pillowcases we've already shown you? Here's a supply list - this is the "hot dog" method which gives you lovely piping and everything:

  • 27 inches by Width of Fabric for body of pillowcase (this is roughly 3/4ths of a yard)
  • 10 inches by Width of Fabric for trim (roughly 1/3 of a yard, which is really 12 inches)
  • 1 1/2 - 2 inches by Width of Fabric for piping (I recommend 1/8th a yard, it's a little wider, but easier to work with)
Here's the directions without any nifty pictures for a tutorial. Please, comment if you would like a better tutorial. We can work on a video or pictures. We can try to work on this at the sew-a-thon on Saturday!

  1. Trim all pieces to the width of the shortest fabric. You are hoping to have it measure around 20-21 inches when folded! (This is important. Everything will just sew together faster if you go ahead and match your fabric widths! Trust me!)
  2. Fold piping in half lengthwise and iron.
  3. Stitch the piping to the body using 1/4 inch seam allowance.
  4. Roll the body of the case up jelly roll (swiss cake roll, yum!) fashion, from the raw edges to the edge with the piping. Pin in several places through all the layers just to hold it.
  5. Lay the trim face up on the table. Place the pillowcase body on top, matching the raw edge to your edge with the piping.
  6. Fold your trim body edge up and around and pin. (This is what makes your hot dog! Your trim is the "bun", your body is the "hot dog" and your piping is like the "ketchup". Can you see it? Great!)
  7. Stitch all the layers together. Don't forget to backstitch the ends!
  8. Now you have a tube. You gently push the insides through one end. This is kind of fun because there's a bit of a "pop" as you reach a breaking point and then poof, everything just comes out easy as anything.
  9. Iron everything flat. Feel free to topstitch if you feel the need, or add a decorative stitch. Or not. It's all the same.
  10. With WRONG sides together, stitch along the side opening using a scant 1/4 inch seam. Iron to one side, then turn inside out and iron right at the seam line.
  11. With RIGHT sides together, stitch a 3/8ths seam, encasing the previous seam. (This is a known as a French Seam and means you have no raw edges/exposed seams! Nice touch! Now you have fancy schmancy pillowcase in the making!)
  12. Repeat steps 10-11 for the bottom seam.
  13. Iron, take a picture, upload to the internet, and share with us... because... YOU ARE DONE!
Seriously, it is that easy.

I did find this tutorial which seems OK. Has loads of pictures.

Caramon is avidly collecting pillowcases, fabric, and items. If you are interested in helping out, please let us know. Our hope is to work hard this month and the start of December. We will log the pillowcases made at our local quilt store for the Million Pillowcase Challenge.

We already have 16 pillowcases we received in the mail. I look forward to updating that number this weekend!

--Lady O and Caramon, the Million Pillowcase Kid